Management
Introduction
The DBC platform uses a graphical user interface web management interface for all components available to the user. This guide describes the menus and options in the DBC platform web management interface used for managing the system.
Organization of the Manual
This manual contains the following chapters and appendix:
- System Menu
This chapter covers the System menu. It describes how to perform backups, perform file management, upgrade the DBC platform software, and perform system control activities. This chapter also describes how to restart production mode, restart the DBC platform web server, clear user data, enter maintenance mode, power down the system, use the DBC platform tools, work with File Play, and run the vulnerability simulator.
- Support Menu
This chapter covers the Support menu. It describes how to run system status reports, make a support connection, and view counters.
- Audit Log Codes
This chapter lists the codes for each category in the audit log.
- APPENDIX A - Glossary
This appendix defines the technical terms in this manual. In this manual, the first time a technical term is used, it appears as a hyperlink. If you click the link in the electronic document, you are taken to the definition for that term in the glossary. Clicking the term in the glossary returns you to the first instance of that term in the electronic document.
Changes in This Revision
- Added GDPR/Data Classifier feature into the Compliance product.
System Menu
| This chapter describes the options in the System menu. |
Backups
Path: System > Backups
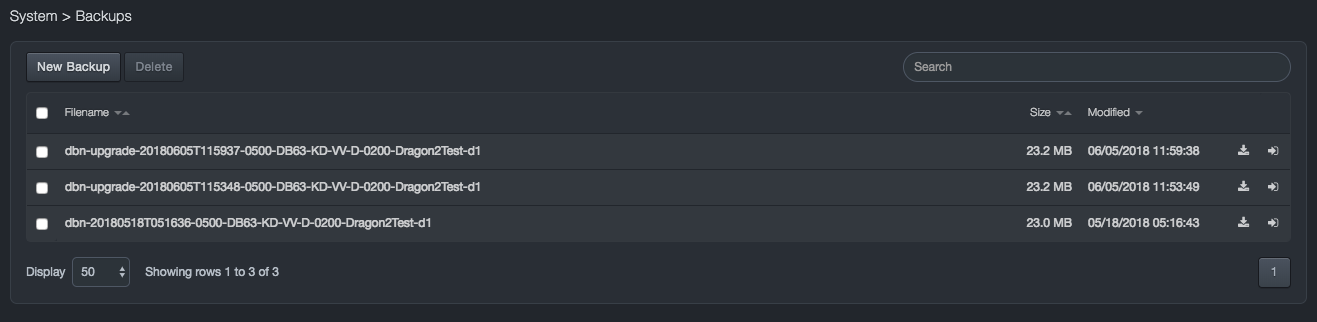
Backups are system images that you capture at a certain point in time. You can use a system image to restore all user data and the system’s database. When you restore the DBC platform, a complete restoration is performed — you cannot choose individual items to restore; all of your user data and the system database are replaced by the system image. Backups are stored on the DBC platform’s internal disk.
You create backups of the system image using the Backups page. We recommend you back up the system image frequently, so that you can restore from the most current system image as needed.
The Backups page also shows backups created during the upgrade process.
Creating a System Backup
To create a system backup
-
Click System > Backups. A Backups page appears.
-
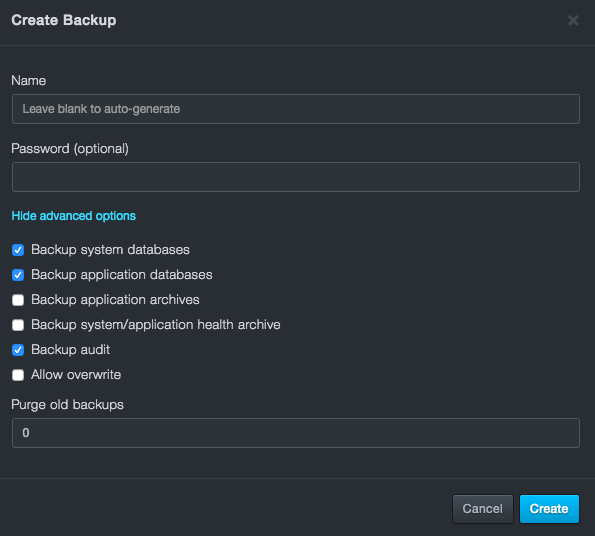
At the top-left side of the page, click New Backup.
-
In the Backup Name field, enter a name for the backup file. You can enter a password to protect the backup as well.
-
The advanced options dropdown provides a dropdown menu with the following options:
-
Backup system databases (default)
-
Backup application databases (default)
-
Backup application archives
-
Backup system/application health archive
-
Backup audit (default)
-
Allow overwrite
-
Purge old backups
-
-
Click Create.
Downloading a Backup File
After you create a system backup file, you can download it to your computer.
When you download a backup file, the system prompts you for a password. While it is not required to enter a password, we recommend you specify one to avoid risking the compromise of sensitive data.
To download a backup file
-
Click System > Backups. A Backups page appears.
-
On the right side of the page, click the
 icon for the backup file you want to download. If the download has a
password, a dialog box will open up asking for the case-sensitive
password. For security, each typed password character is masked with
a dot (•).
icon for the backup file you want to download. If the download has a
password, a dialog box will open up asking for the case-sensitive
password. For security, each typed password character is masked with
a dot (•). -
Click Download.
Deleting a Backup or Upgrade File
There might be times when you no longer need a backup or upgrade file. In these cases, you can delete the file from the system.
To delete a backup or upgrade file
-
Click System > Backups. The Backups page appears.
-
On the left side of the page, check the empty box next to the name of each backup to delete so that a checkmark
 appears.
 -
Click Delete to delete the file (or click Cancel to retain the file). A message asks whether you are sure you want to delete the file.
File Management
Path: System > File Management
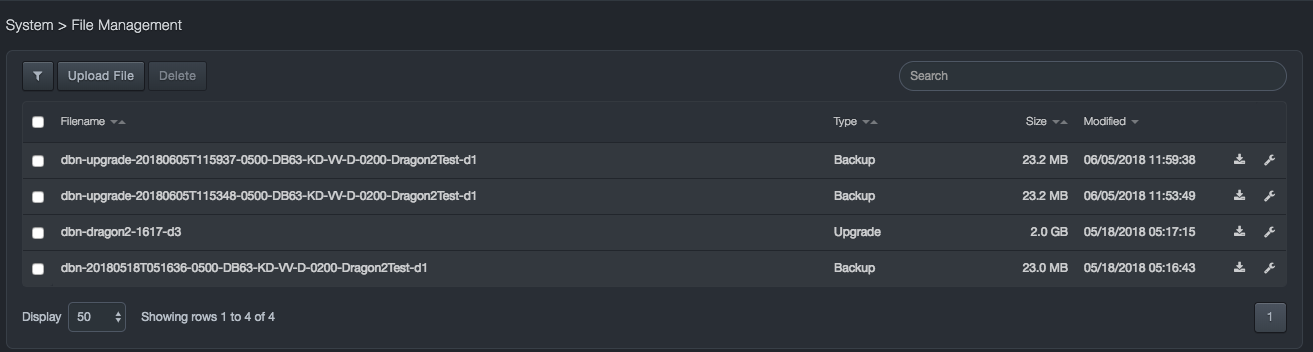
Like the Backups page, the File Management page allows you to download and delete backup files. Unlike the Backups page, the File Management page allows you to upload, upgrade, and backup files to the system.
File Management Page
| Column | Description |
|---|---|
 Filter Filter |
Allows you to filter between backup and upgrade files. |
| Filename | Displays file name. |
| Type | Shows whether the backup file is for an upgrade or a backup. |
| Size | Size of the file. |
| Modified | Status information about when the file was last modified. |
Downloading a File
After you create a system backup file using the Backup page, you can download it as necessary. This procedure is the same as the one described in the backups section, only this procedure is performed from the File Management page.
When you download a backup file, the system prompts you for a password. While it is not required to enter a password, we recommend you specify one to avoid risking the compromise of sensitive data.
To download a backup file
-
Click System > File Management. The File Management page appears.
-
On the right side of the page, click the
 icon for the backup file you want to download. If the download has a
password, a dialog box will open up asking for the case-sensitive
password. For security, each typed password character is masked with
a dot (•).
icon for the backup file you want to download. If the download has a
password, a dialog box will open up asking for the case-sensitive
password. For security, each typed password character is masked with
a dot (•). -
Click Download.
Uploading a Backup or Upgrade File
You can upload a backup or upgrade file to the system. For convenience, the system determines automatically whether the file being uploaded is a backup or an upgrade file.
To upload a backup or upgrade file
-
Click System > File Management. The File Management page appears.
-
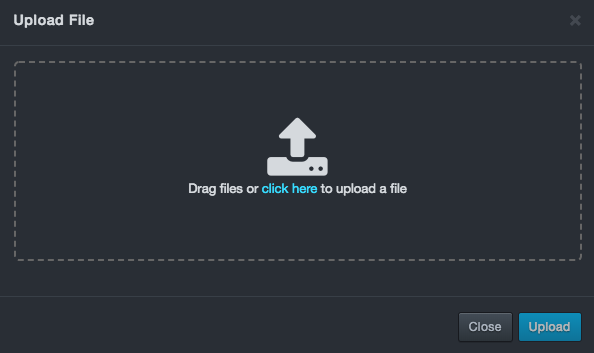
On the top-left side of the page, click Upload File. The Upload File modal appears, like the example below:
-
Click the “Click Here” file and upload the backup/upgrade file.

-
Use the Open dialog box to navigate to the location where the file you want to upload is located. Then click the file and click Open. A status bar above the Upload File button shows the progress of the upload.
Deleting a File
There might be times when you no longer need a backup or upgrade file. In these cases, you can delete the file from the system.
To delete a backup or upgrade file
-
Click System > File Management. The File Management page appears.
-
On the left side of the page, check the empty box next to the name of each backup to delete so that a checkmark
appears. -
Click Delete to delete the file (or click Cancel to retain the file). A message asks whether you are sure you want to delete the file.
Upgrades
Path: System > Upgrades
The Upgrades page shows the current software release loaded on the system and the date it was loaded.

A Freeze button at the top-right side of the page allows you to stop automatic upgrades. This feature is useful for highly active sites.
For detailed instructions on how to upgrade the software, see the Software Upgrade Instructions.
Job Status
Path: System > Job Status
The Job Status page shows the status of jobs running and completed in the system. A Delete button allows you to delete selected jobs. A Download button allows you to download a CSV file containing all the jobs and their status.
Jobs have a hierarchy, so you can drill down into a job to view its sub-jobs. An ellipsis button to the right of each sub-job allows you to perform job-specific tasks including viewing the output details about a sub-job and aborting, rolling back, and force-failing a sub-job.
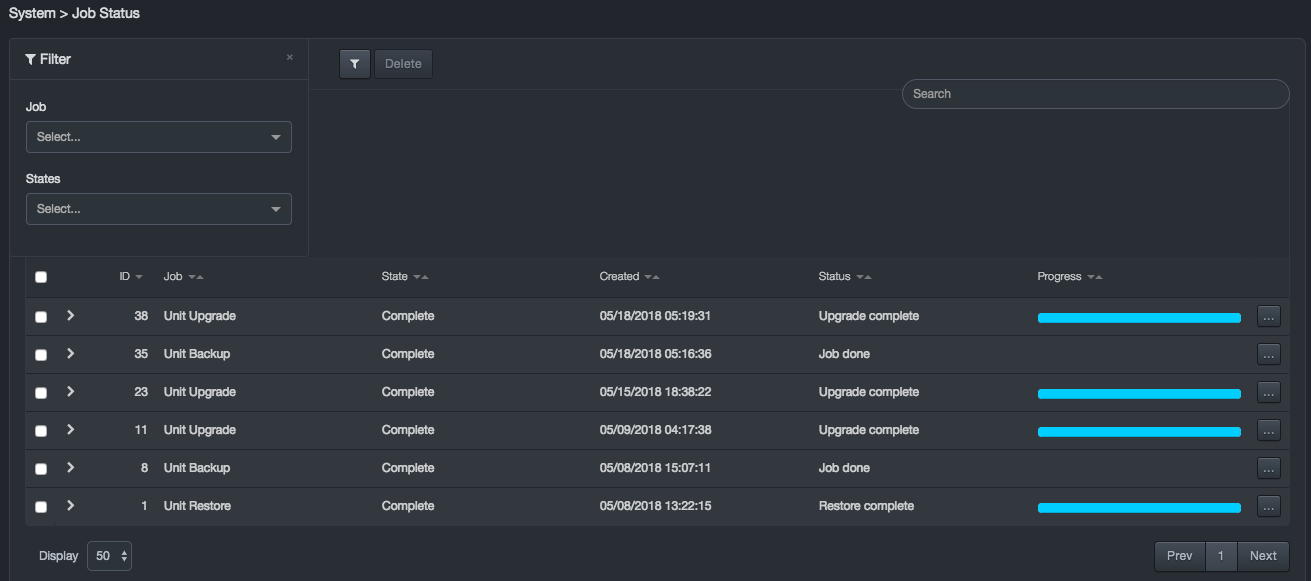
Columns in the Job Status Page
| Column | Description |
|---|---|
| ID | Unique ID assigned to a job or sub-job. |
| Job | Name of the job. |
| State | State of the job. |
| Updated | Last time the job was updated. If the job is completed, this indicates when the job finished. |
| Status | Live status of the job while it is active. |
| Progress | Live progress of the job while it is active. |
Filtering Jobs
The Job Status page provides filter controls that allow you to filter jobs by job and states to view only the jobs that interest you.
To filter jobs
-
Click System > File Management. The File Management page appears.
-
On the top-left side of the page, click the
 icon. The filter panel appears on the left
side of the page.
icon. The filter panel appears on the left
side of the page.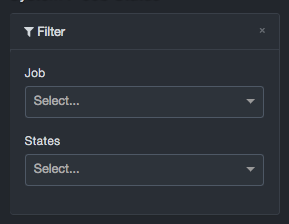
-
Use the Job drop-down list to select a job and/or the States list to select a job state. Filtering occurs as soon as you make you selection in either list.
-
To clear a filter, click the X on the right side of the drop-down list.
Drilling Down to View Sub-jobs
Jobs may have sub-jobs associated with them and are designated with an > icon in the left column. To view the sub-jobs associated with a job, click the > icon. For example:
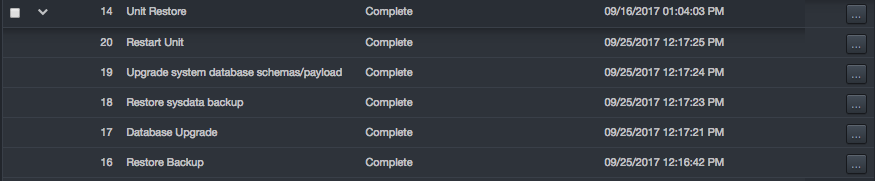
Each sub-job row has an ellipses button on the right side. Clicking this button displays options specific for each job.

Clicking View displays details about the sub-job in an Output area and changes the breadcrumb at the top of the page to reflect the sub-job being viewed. For example:
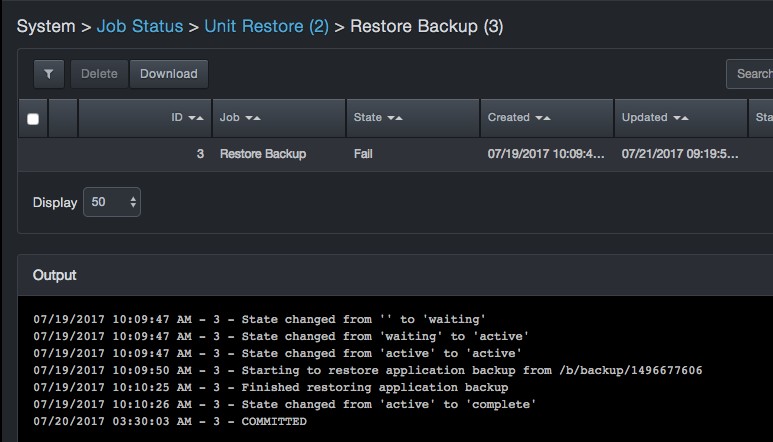
 |
Note: Do not select Force fail unless instructed by DB CyberTech Technical Support. |
Deleting Jobs
If you no longer need jobs, you can delete them from the system.
|
Note: A precautionary message does not appear when you delete a job. Therefore, be sure you do not need a job before you delete it. |
To delete jobs
-
Click System > Job Status. The Job Status page appears.
-
In the left column, check the jobs you want to delete.
-
At the top-left side of the page, click Delete.
Restart Production Mode
Path: System > Restart Production Mode
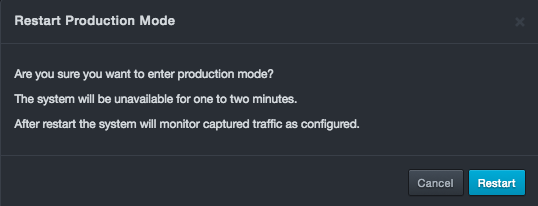
Clicking System > Restart Production Mode allows you to restart DBC platform in Production Mode (its standard operating mode). If you restart DBC platform, the system is unavailable for one or two minutes. After DBC platform restarts, it will monitor captured traffic using the configured settings.
To restart DBC platform in production mode
-
Click System > Restart Production Mode. The Restart Production Mode message appears.
-
Click Restart.
Restart Web Server
Path: System > Restart Web Server
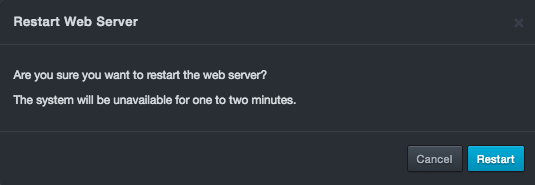
Clicking System > Restart Web Server allows you to restart the DBC platform web server that supports the web management interface. Restarting the web server drops your connection to DBC platform briefly and you will have to log back in; however, system operation is not affected.
To restart DBC platform web server
-
Click System > Restart Production Mode. The Restart Web Server message appears.
-
Click Restart.
Clear User Data
Path: System > Clear User Data
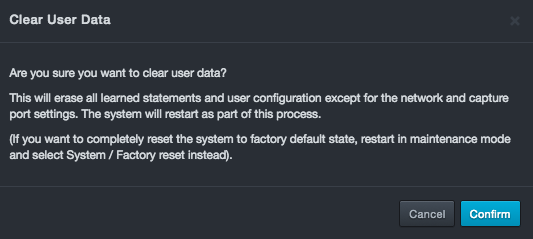
Clicking System > Clear User Data allows you to clear all events and learning profiles but retain IP settings.
 |
Warning: Use extreme care when clearing user data because you will erase all learned statements and user configurations, except for network and capture port settings. |
To clear user data
-
Click System > Clear User Data. The Clear User Data message appears.
-
Click Confirm.
Maintenance Mode
Path: System > Enter Maintenance Mode
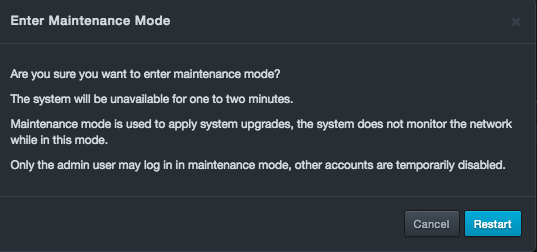
Clicking System > Enter Maintenance Mode allows you to restart DBC platform in maintenance mode. Maintenance mode allows you to perform maintenance operations, such as file management, system upgrades, and system backup restores. However, DBC platform does not monitor the network while in maintenance mode.
To place the DBC platform in maintenance mode
-
Click System > Enter Maintenance Mode. The Enter Maintenance Mode message appears.
-
Click Restart.
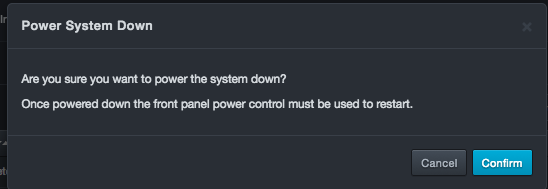
Powering Down the System
Path: System > Power System Down
Clicking System > Power System Down allows you to shut off the power to the DBC platform.
To power down the platform
-
Click System > Power System Down. The Power System Down message appears.
-
Click Confirm.
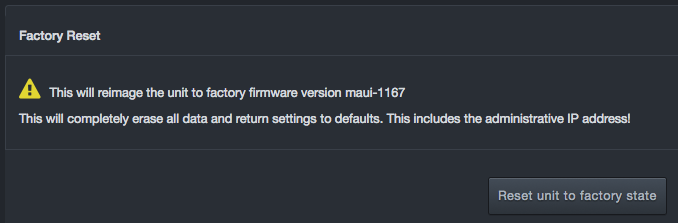
Performing a Factory Reset
Path: System > Factory Reset
Clicking System > Factory Reset resets the DBC platform and returns its settings to the factory default values.
|
Warning: Performing this procedure deletes all data and erases all overrides you made to the DBC platform default settings. |
To perform a factory reset
-
Click System > Factory Reset. The Factory Reset message appears.
-
Click Reset unit to factory state.
Support Menu
| This chapter describes the options in the Support menu. |
Running System State Reports
Path: Support > System State Reports
The System State Reports page lists the system state reports that have been generated.

To generate a system state report
-
Click Support > System State Reports. The System State Reports page appears.
-
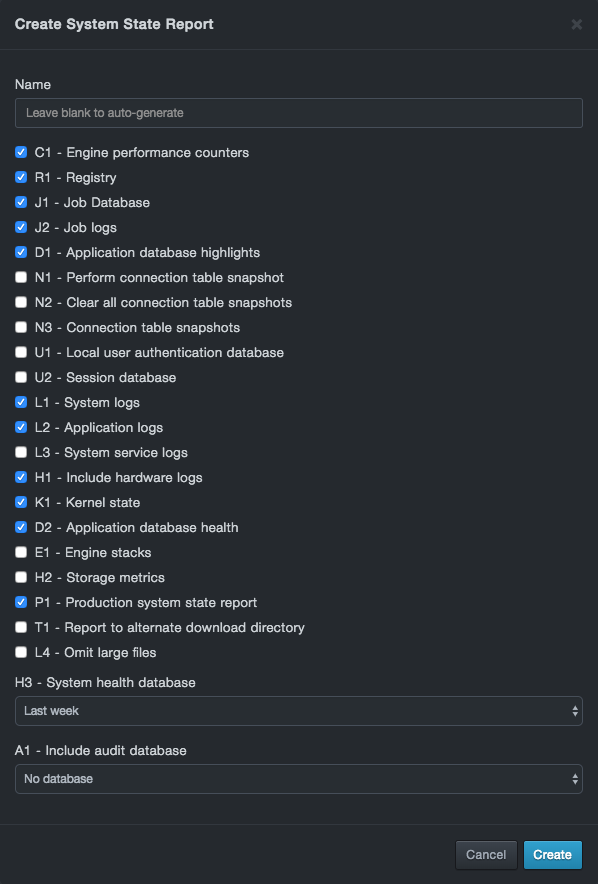
At the top-left side of the page, click New Report. The New Report dialog box appears.
-
In the Report name field, enter a name for the report. If you do not enter a name, DBC platform assigns one automatically.
-
Add the appropriate items to the SSR for evaluation. The DB CyberTech Technical Support team will provide guidance for the data needed for evaluation. Options are described below.
Columns in the Job Status Page
| Options | Default | Approximate Size (bytes) | Description |
|---|---|---|---|
| C1 – Engine Performance Counters | Include | 3M | Include the last 30 minutes of 2 second engine performance counters |
| R1 – Registry | Include | 200K | Include system configuration settings |
| J1 – Job Database | Include | 4 – 200K | Include current and historical job data but not detailed logs for each job |
| J2 – Job logs | Include | 1M | Include logs for every job, current and historical |
| D1 – Application database highlights | Include | 100K to 5M+ | Include a dump of critical analytics database tables |
| N1 – Perform connection table snapshot | Exclude | NA | Generates and engine connection table snapshot as SSR executed. No data included, snapshot data is stored on a local database |
| N2 - Clear all connection table snapshots | Exclude | NA | Clears all extant connection table snapshots |
| N3 - Connection table snapshots | Exclude | 1K – 100M+ | Include all existing connection table snapshots |
| U1 – Local user authentication database | Exclude | 2K+ | Include the local user authentication database |
| U2 – Session database | Exclude | 2K+ | Include a copy of the current session database |
| L1 – System logs | Include | 500K+ | Include text log files from platform and database daemons |
| L2 – Application logs | Include | 5M – 500M+ | Include diagnostic data for all application worker daemons |
| L3 – System service logs | Exclude | 700K+ | Include all journal data from system |
| H1 – Include hardware logs | Include | 10K+ | Include system sensor status, power, watchdog, and hardware failure logs |
| K1 – Kernel state | Include | 900K+ | Include kernel statistics and internal state data |
| D2 – Application database health | Include | 2K | Include health and space utilization data for the application database |
| E1 – Engine stacks | Exclude | 3K | Include a snapshot of all threads in the real time engine |
| H2 – Storage metrics | Exclude | 8K+ | Include SMART output for primary and archive storage drives |
| P1 – Production system state report | Include | NA | If the system is in maintenance mode, pull data from the production instance |
| T1 – Report to alternate download directory | Exclude | NA | Store SSR in public download directory for dump |
| L4 – Omit large files | Exclude | NA | Omits files larger than 50M from the application log dump |
| H3 – System health database | Last week | Up to 2G | Include system health counter database. Options: No database, Last week, Last month, All data |
| A1 – Include audit database | No database | 2K – 2M | Include the audit database. Options: All data, Last week |
-
Click Create. The system generates a report about the key operating conditions at that time.
-
To download a report, click the
 icon at the right side of the page.
 -
To delete a report, click the
 icon at the right side of the page. When the Confirmation message appears, click Delete to delete the report (or click Cancel to retain it).
Making a Support Connection
Path: Support > Support Connection
The Support Connection page provides two functions:
-
It allows the DB CyberTech service organization to assess the DBC platform status and provide maintenance if the system requires it.
-
Allows syslog messages, including system health, to be sent to DB Network’s Security Operations Center, where support personnel can provide proactive maintenance.
Starting the Maintenance Connection
The Maintenance Connection is an SSH connection between DBC platform and the DB CyberTech Security Operations Center, which typically is created and left operational.
To configure the Maintenance Connection
-
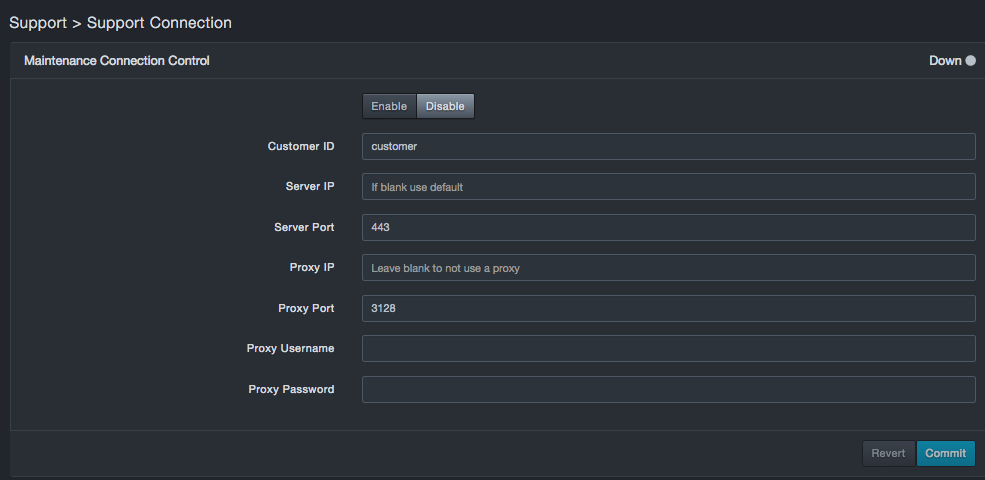
Click Support > Support Connection. The Maintenance Connection Control page appears.
-
At the top of the page, click Enable.
-
In the Settings box, complete the fields.
-
Click Commit to save the configuration (or click Revert to discard the new configuration revert to the previous one). The Maintenance Connection comes up in less than a minute if configured properly and the Internet is accessible from the DBC platform location. To ensure an up-to-date indication of its status, the Maintenance Connection status refreshes every 15 seconds.
Fields in the Maintenance Connection Control Box
| Column | Description | Default |
|---|---|---|
| Customer ID | Enter the Customer ID you were assigned when you received your services support package. | customer |
| Server address | Enter the server IP address. | — |
| Server Port | Enter the server port number included in your service support package. | 443 |
| Proxy address | Enter the proxy IP address. To not use a proxy, leave this field blank. | — |
| Proxy Port | Enter the proxy port number. | 3128 |
| Proxy Username | Enter the proxy user name. | — |
| Proxy Password | Enter the proxy password. For security, each typed character is masked with a dot (•). | — |
Counters
Path: Support > Counters
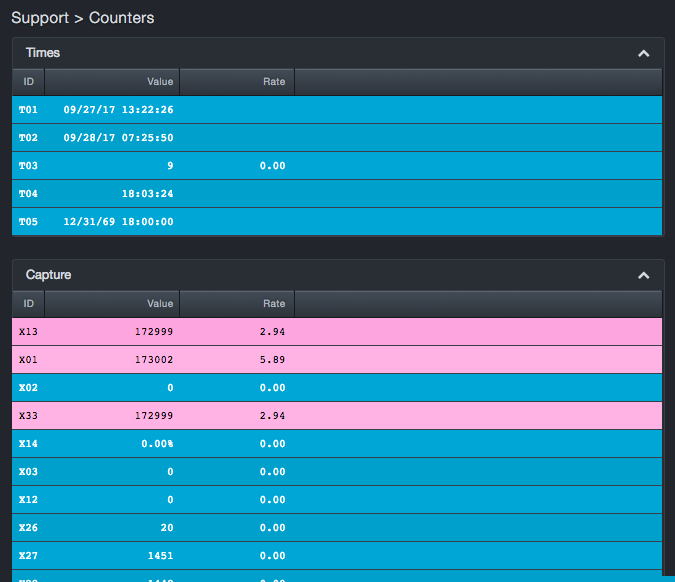
Counters are debug tools that DB CyberTech uses for health monitoring. For more information, contact support@dbcybertech.com.
Accessing the CLI
Path: Support > CLI
The DBC platform provides a CLI. The CLI should be used only with the guidance of DB CyberTech. For more information, contact support@dbcybertech.com.
Audit Log Codes
| This chapter describes the Audit Log codes. |
Audit codes are organized into the following groups.
|
|
|---|---|
|
|
|
|
|
|
|
Audit Codes for Security Operations (1xxx)
| Code | Message | Target |
|---|---|---|
| 1000 | Create user | User |
| 1001 | Update user | User |
| 1002 | Delete user | User |
| 1003 | Update user's password | User |
| 1004 | Lock user | User |
| 1005 | Unlock user | User |
| 1006 | Clear user's failed log in attempts | User |
| 1007 | Clear user's old passwords | User |
| 1008 | Logout all users | User |
| 1009 | User log in succeeded | User |
| 1010 | User log in failed | User |
| 1011 | Logout user | User |
| 1012 | Not authorized | User |
| 1013 | Not permitted | User |
| 1014 | Create role | Role |
| 1015 | Update role | Role |
| 1016 | Delete role | Role |
| 1017 | Update authentication configuration | Authentication |
| 1018 | Update tunnel configuration | Tunnel |
| 1019 | Update SSL configuration | SSL |
| 1020 | Update redaction configuration | Redaction |
| 1021 | Clear audit log | AuditLog |
| 1022 | Update audit configuration | AuditLog |
| 1023 | Audit Error | AuditError |
| 1024 | Create session | Session |
| 1025 | Delete session | Session |
| 1026 | Enable SSH remote access | SSH |
| 1027 | Disable SSH remote access | SSH |
| 1028 | Create API key | APIKey |
| 1029 | Update API key | APIKey |
| 1030 | Delete API key | APIKey |
| 1031 | Lock API key | APIKey |
| 1032 | Unlock API key | APIKey |
| 1033 | Update Strict-Transport-Security HTTP header configuration | HSTS |
| 1034 | Update user interface port configuration | UIPorts |
| 1035 | Update global redaction settings | GlobalRedaction |
| 1036 | Update shell password | ShellPassword |
| 1037 | Deleted shell password | ShellPassword |
Audit Codes for System Operations (2xxx)
| Code | Message | Target |
|---|---|---|
| 2000 | Update network configuration | Network |
| 2001 | Update capture filter | CaptureFilter |
| 2002 | Update capture filter mode | CaptureFilter |
| 2003 | Create capture VLAN | CaptureVLAN |
| 2004 | Update capture VLAN | CaptureVLAN |
| 2005 | Delete capture VLAN | CaptureVLAN |
| 2006 | Update capture source | CaptureSource |
| 2007 | Enable capture source identify | CaptureSource |
| 2008 | Disable all capture source identifiers | CaptureSource |
| 2009 | Update NTP configuration | Time |
| 2010 | Update server time | Time |
| 2011 | Update server timezone | Time |
| 2012 | Update syslog configuration | Syslog |
| 2013 | Restart system | System |
| 2014 | Power system down | System |
| 2015 | Restart UI server | System |
| 2016 | Reset to factory configuration | System |
| 2017 | Create system state report | SystemStateReport |
| 2018 | Delete system state report | SystemStateReport |
| 2019 | Initialize system for file management | FileManagement |
| 2020 | Upload backup | Backup |
| 2021 | Delete backup | Backup |
| 2022 | Download backup | Backup |
| 2023 | Set password for backup | Backup |
| 2024 | Unlock backup | Backup |
| 2025 | Initialize system for restoring a backup | Backup |
| 2026 | Restore backup | Backup |
| 2027 | Create backup | Backup |
| 2028 | Upload update | Update |
| 2029 | Delete update | Update |
| 2030 | Apply update | Update |
| 2031 | Kill watchdog | Watchdog |
| 2032 | Enable watchdog | Watchdog |
| 2033 | Disable watchdog | Watchdog |
| 2034 | Update registry | Registry |
| 2035 | Update CMS configuration | CMS |
| 2036 | Create a unit within CMS | N/A |
| 2037 | Create a unit within CMS | Unit |
| 2038 | Delete a unit within CMS | N/A |
| 2039 | User accepted the EULA | EULA |
| 2040 | EULA covered under separate agreement | EULA |
| 2041 | Clear user data | System |
| 2042 | System resource lock debug | [lockName] |
| 2043 | Delete job | Job |
| 2044 | CMDB data was downloaded | CMDB |
| 2045 | CMDB data was merged into the system | CMDB |
| 2046 | CMDB configuration data was downloaded | CMDB |
| 2047 | CMDB configuration data was loaded | CMDB |
| 2048 | User did not accept the EULA | EULA |
| 2049 | Create archive drive | System |
| 2050 | Expand archive drive | System |
| 2051 | Expand primary drive | System |
| 2052 | System started | System |
| 2053 | File uploaded | File |
| 2054 | File downloaded | File |
| 2055 | File deleted | File |
| 2056 | Update a file | File |
| 2057 | Prepare CMS configuration | CMS |
| 2058 | Deregister CMS configuration | CMS |
| 2059 | Abort job | Job |
| 2060 | Force fail job | Job |
| 2061 | Detach job | Job |
| 2063 | Create a new user-defined term | Classifier: GDPR |
| 2064 | Delete a user-defined term | Classifier: GDPR |
| 2065 | Exclude service from classifier | Classifier: GDPR |
| 2066 | Include service in classifier | Classifier: GDPR |
Audit Codes for Application Operations (3xxx)
| Code | Message | Target |
|---|---|---|
| 3000 | Map a service to a database | Mapping |
| 3001 | Unmap a service from a database | Mapping |
| 3002 | Unmanage a service | Mapping |
| 3003 | Update time period | TimeLearning |
| 3004 | Commit time learning | TimeLearning |
| 3005 | Learn statement | StatementLearning |
| 3006 | Blacklist statement | StatementLearning |
| 3007 | Update database configuration | Database |
| 3008 | Terminal session started | Terminal |
| 3009 | Terminal session ended | Terminal |
| 3010 | Terminal session not authorized | Terminal |
| 3011 | Terminal session not authorized for tail | Terminal |
Audit Codes for User Interface Calls (4xxx)
| Code | Message |
|---|---|
| 4000 | UI route logs |
Audit Codes for CLI Commands (5xxx)
| Code | Message |
|---|---|
| 5000 | CLI command run |
| 5001 | CLI command failed |
Audit Codes for LDAP Authority (6xxx)
| Code | Message |
|---|---|
| 6000 | Ldap authentication logs |
Audit Codes for Access Control List (7xxx)
| Code | Message |
|---|---|
| 7000 | Access control list |
| 7001 | Access control list debug |
Audit Codes for Certificate Operations (8xxx)
| Code | Message |
|---|---|
| 8000 | Certificate debug |
| 8001 | Certificate being used |
| 8002 | Certificate has been verified |
Audit Codes for Certificate Operations (10xxx)
| Code | Message | Target |
|---|---|---|
| 10000 | Backup remote unit | Node |
| 10001 | Create archive drive on remote unit | Node |
| 10002 | Expand archive drive on remote unit | Node |
| 10003 | Expand primary drive on remote unit | Node |
| 10004 | Update network configuration on remote unit | Node |
| 10005 | Power down remote unit | Node |
| 10006 | Restart remote unit | Node |
| 10007 | Restart UI server on remote unit | Node |
| 10008 | Restore backup on remote unit | Node |
| 10009 | Clear user data on remote unit | Node |
| 10010 | Update syslog configuration on remote unit | Node |
| 10011 | Update server time on remote unit | Node |
| 10012 | Apply upgrade on remote unit | Node |
Contact Technical Support
For any technical difficulties you may experience, you can contact DB CyberTech Technical Support at the following:
Email: support@dbcybertech.com
Phone: 1(800) 375-0592
Appendix A-Z Glossary
| Term | Definition |
|---|---|
| API | Application Programming Interface. A set of routines, protocols, and tools for building software applications. |
| Blacklisted statements | Statements that are not added to the learned set. Typically, these statements are used to filter out benign statements generated by DBAs or other non-application related interactions |
| BPF | Berkeley Packet Filter. An architecture for user-level packet capture. BPF provides a raw interface to data link layers in a protocol-independent fashion. |
| CAC | A "smart" card about the size of a credit card used as identification for active duty uniformed service personnel, Selected Reserve, DoD civilian employees, and eligible contractor personnel. |
| CSV | Comma-separated value. Data format where each piece of data is separated by a comma. |
| DHCP | Dynamic Host Protocol Configuration. A standardized network protocol used on Internet Protocol networks to dynamically distribute network configuration parameters, such as IP addresses, for interfaces and services. With DHCP, computing devices like your DBC platform request IP addresses and networking parameters automatically from a DHCP server, reducing the need to configure these settings manually. |
| DNS | Domain Name System. A hierarchical decentralized naming system for computers, services, or any resource connected to the Internet or a private network. DNS translates domain names into the numerical IP addresses to locate and identify computer services and devices with the underlying network protocols. |
| LDAP | Lightweight Directory Access Protocol. A protocol for accessing a directory listing in a TCP/IP network. It is a sibling protocol to HTTP and FTP and uses the ldap:// prefix in its URL. |
| Learned set | Contains statements considered to be part of the application’s normal behavior. |
| MAC | Media Access Control. A hardware address that uniquely identifies each node of a network. |
| MTU | Maximum Transmission Unit. The largest physical packet size measured in bytes that a network can transmit. Any messages larger than the MTU are divided into smaller packets before being sent. |
| Network File System | A client/server application that allows network users to access shared files stored on computers of different types using a Virtual File System that runs on top of TCP/IP. |
| NTP | Network Time Protocol. A networking protocol for clock synchronization between computer systems over packet-switched, variable-latency data networks. |
| pcap | Short for packet capture. A program for capturing network traffic. |
| Server Message Block | A message format used by Windows to share files, directories, and devices. |
| SSL | Secure Sockets Layer. A protocol for transmitting private documents via the Internet. SSL uses a cryptographic system that uses two keys to encrypt data. |

DB CyberTech
15015 Avenue of Science
Suite 150
San Diego, CA 92128
http://www.dbcybertech.com